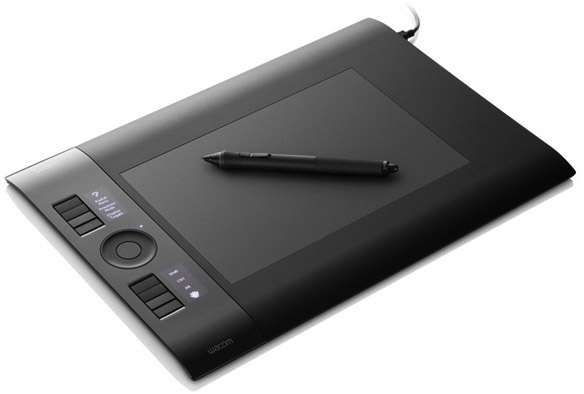
 After developing a tool to manipulate the LEDs of the tablet in Part 1, the next step is to simplify the usage. The idea is to provide profiles which store a tablet configuration (this is, the button keys and the icons of the LED displays). A collection of such profiles is stored in an XML document. The user can choose the appropriate profile by using a command line tool. The setup and usage of the tool is described in the following.
Notes: In order to use this tool, the following is required:
- The Linux Wacom tool xsetwacom must be installed.
- The command
intuos4-led-config(see Part 1) must be installed and located as an executable in one of the directories/usr/bin,/usr/local/bin,%HOME/bin.. - The user must be in the sudo group.
Installation
The command line tool is written in Python. Hence, Python and some related stuff must be installed. Under Debian GNU/Linux, this is done with the following command:
sudo apt-get install python python-argparse
To install the config tool, download the source archive. Extract the archive by executing the following command (by replacing xyz with the version number of the archive) :
tar xzf intuos4-config-xyz.tar.gz
After that, change directory to the extracted directory:
cd intuos4-config-xyz
Build the package by executing:
python setup.py build
If an error occurs, then check whether a python library is missing. If the build is successful, then install the package with the command:
sudo python setup.py install
After that, the config script intuos4-config.py can be found in the folder /usr/local/bin. Furthermore, a sample configuration is provided in the folder
Setup
For a quick start, the sample configuration must be copied into the user’s home folder. This is done as follows:
mkdir $HOME/.intuos4
cp -r /usr/local/share/intuos4/* $HOME/.intuos4/
After this, the config tool is ready to use. The command
intuos4-config.py --list
lists the names of the available profiles. In the example there included are three profiles: Demo, Image Demo, and GIMP.
To apply the profile Demo to the tablet, execute:
intuos4-config.py --profile Demo
Note, that you need to enter your password, since some of the internal commands of the script need superuser rights.
The default name of the tablet device is Wacom Intuos4 6x9 pad which corresponds to the Wacom Intuos4 M tablet. If an Intuos4 tablet of a different size is used, the device name can be passed to intuos4-config.py with the argument --device. Note, that you can determine the name of your device by executing
xsetwacom --list | grep pad
and removing the tailing PAD.
To apply the profile Image Demo to the tablet, execute:
intuos4-config.py --profile "Image Demo"
Note the quotation marks which are used if the name contains a whitespace character.
Creating new profiles
The available profiles are stored in the file
The basic layout of the XML document is:
<intuos4settings device="Wacom Intuos4 6x9 pad">
  <profiles default="Name1">
    <profile name="Name1" lefthanded="false">
      ...
    </profile>
    ...
    <profile name="Name110" lefthanded="false">
      ...
    </profile>
  </profiles>
</intuos4settings>
The element intuos4settings is the outermost element of the XML document. The default device may be provided by the attribute device. The profiles are stored within the element profiles. The name of the default profile may be set with the attribute default. There is no restriction on the number of profiles.
A profile stores the configuration of all eight display buttons plus the button in the center of the wheel. An example for a profile is presented in the next listing:
<intuos4settings device="Wacom Intuos4 6x9 pad">
  <profiles default="GIMP">
    <profile name="Demo" lefthanded="False">
      <button number="1">
        <oled type="icon" name="ButtonOne"></oled>
        <keystroke key="1"></keystroke>
      </button>
      <button number="2">
        <oled type="icon" name="ButtonTwo"></oled>
        <keystroke key="2"></keystroke>
      </button>
      <button number="3">
        <oled type="icon" name="ButtonThree"></oled>
        <keystroke key="3"></keystroke>
      </button>
      <button number="4">
        <oled type="icon" name="ButtonFour"></oled>
        <keystroke key="8"></keystroke>
      </button>
      <button number="5">
        <oled type="icon" name="ButtonFive"></oled>
        <keystroke key="5"></keystroke>
      </button>
      <button number="6">
        <oled type="icon" name="ButtonSix"></oled>
        <keystroke key="6"></keystroke>
      </button>
      <button number="7">
        <oled type="icon" name="ButtonSeven"></oled>
        <keystroke key="7"></keystroke>
      </button>
      <button number="8">
        <oled type="icon" name="ButtonEight"></oled>
        <keystroke key="8"></keystroke>
      </button>
    </profile>
    <profile name="Image Demo" lefthanded="False">
      <button number="1">
        <oled type="image" name="~/.intuos4/icons/icon-cut.png"></oled>
        <keystroke key="ctrl x"></keystroke>
      </button>
      <button number="2">
        <oled type="image" name="~/.intuos4/icons/icon-copy.png"></oled>
        <keystroke key="ctrl c"></keystroke>
      </button>
      <button number="3">
        <oled type="image" name="~/.intuos4/icons/icon-paste.png"></oled>
        <keystroke key="ctrl v"></keystroke>
      </button>
      <button number="4">
        <oled type="icon" name="Save"></oled>
        <keystroke key="">ctrl s</keystroke>
      </button>
      <button number="5">
        <oled type="icon" name="Blank"></oled>
        <keystroke key=""></keystroke>
      </button>
      <button number="6">
        <oled type="image" name="~/.intuos4/icons/icon-tux-inverse.png"></oled>
        <keystroke key=""></keystroke>
      </button>
      <button number="7">
        <oled type="icon" name="DebianLogo"></oled>
        <keystroke key=""></keystroke>
      </button>
      <button number="8">
        <oled type="icon" name="WacomLogo"></oled>
        <keystroke key=""></keystroke>
      </button>
      <wheel button="ctrl z"></wheel>
    </profile>
    <profile name="GIMP" lefthanded="false">
      <button number="1">
        <oled type="icon" name="Undo"></oled>
        <keystroke key="ctrl z"></keystroke>
      </button>
      <button number="2">
        <oled type="icon" name="Redo"></oled>
        <keystroke key="ctrl y"></keystroke>
      </button>
      <button number="3">
        <oled type="icon" name="ZoomIn"></oled>
        <keystroke key="plus"></keystroke>
      </button>
      <button number="4">
        <oled type="icon" name="ZoomOut"></oled>
        <keystroke key="minus"></keystroke>
      </button>
      <button number="5">
        <oled type="icon" name="Save"></oled>
        <keystroke key="ctrl s"></keystroke>
      </button>
      <button number="6">
        <oled type="icon" name="Alt"></oled>
        <keystroke key="alt"></keystroke>
      </button>
      <button number="7">
        <oled type="icon" name="Ctrl"></oled>
        <keystroke key="ctrl"></keystroke>
      </button>
      <button number="8">
        <oled type="icon" name="ArrowUp"></oled>
        <keystroke key="shift"></keystroke>
      </button>
      <wheel button="Ctrl E"></wheel>
    </profile>
  </profiles>
</intuos4settings>
The settings of a profile are stored in the element profile. The attribute name stores the name of the profile. This name must be unique. The optional attribute lefthanded handles the orientation of the tablet.
The element button stores the configuration of a particular display button. The number of the button is set by the attribute number which must be an integer between 1 and 8. The subelement oled contains the configuration of the button’s LED. It owns the two attributes type and name with the following meaning:
- If
typeequals"icon", thennamerefers to a builtin icon of the commandintuos4-led-config(see Part 1 for details). - If
typeequals"image", thennameis the path to an image file located on the hard disk.
The element keystroke provides the key stroke of the button. It is stored in the attribute key in the same syntax which is used by xsetwacom.
The element wheel contains the settings of the circle. The key of the button in the center of the circle is set with the attribute button. Again, xsetwacom syntax is used. Independently form the profile, the wheel is setup for scrolling up and down with respect of the rotation direction.
Each user can modify his settings.xml file, this is, adopt the provided profiles or add new ones.
Enjoy!


I just finished setting this up. Everything went perfect (Ubuntu 10.04). The only part that kills some magic is having to use sudo. Otherwise I would probably set up a few different profiles and make a script to switch them with the wheel button.
Anyway, great job, thank you so very much!
Thank you very much! Sudo is necessary to unload and reload the wacom kernel module. I didn’t find a way to do this without root permissions.
hi,
in the intuos4-config.py is a bug:
>> if results.device != None:
>> profile_storage.setDevice(results.device)
The ProfileStorage instance has no attribute “setDevice”.
>> tablet.setDevice(results.device)
Cheers,
Michael
I used this script. Led’s are worked great, but buttons didn’t work.
OS: Kubuntu 11.10
Wacom intuos 4 M
Help me please.
Hi Max, the script indeed does not work with Kubuntu 11.10. You can find a new version which should work properly,
Just letting you know that I just installed it on other machine running Fedora 16. It needed some figuring out (some packages are named differently) but it works 🙂 Thanks!